We'll start with the master bedroom. When we moved in, the door to the master was located at the end of the hallway. The awkward footprint this created gave the room little usable space, and had we left it alone, we would have had the bed pushed into a corner. We quickly realized that by moving the door to the room, we would be able to gain some square footage. Knowing we would be creating a mess in that room, we initially set up our temporary bedroom in the small back bedroom of the house.
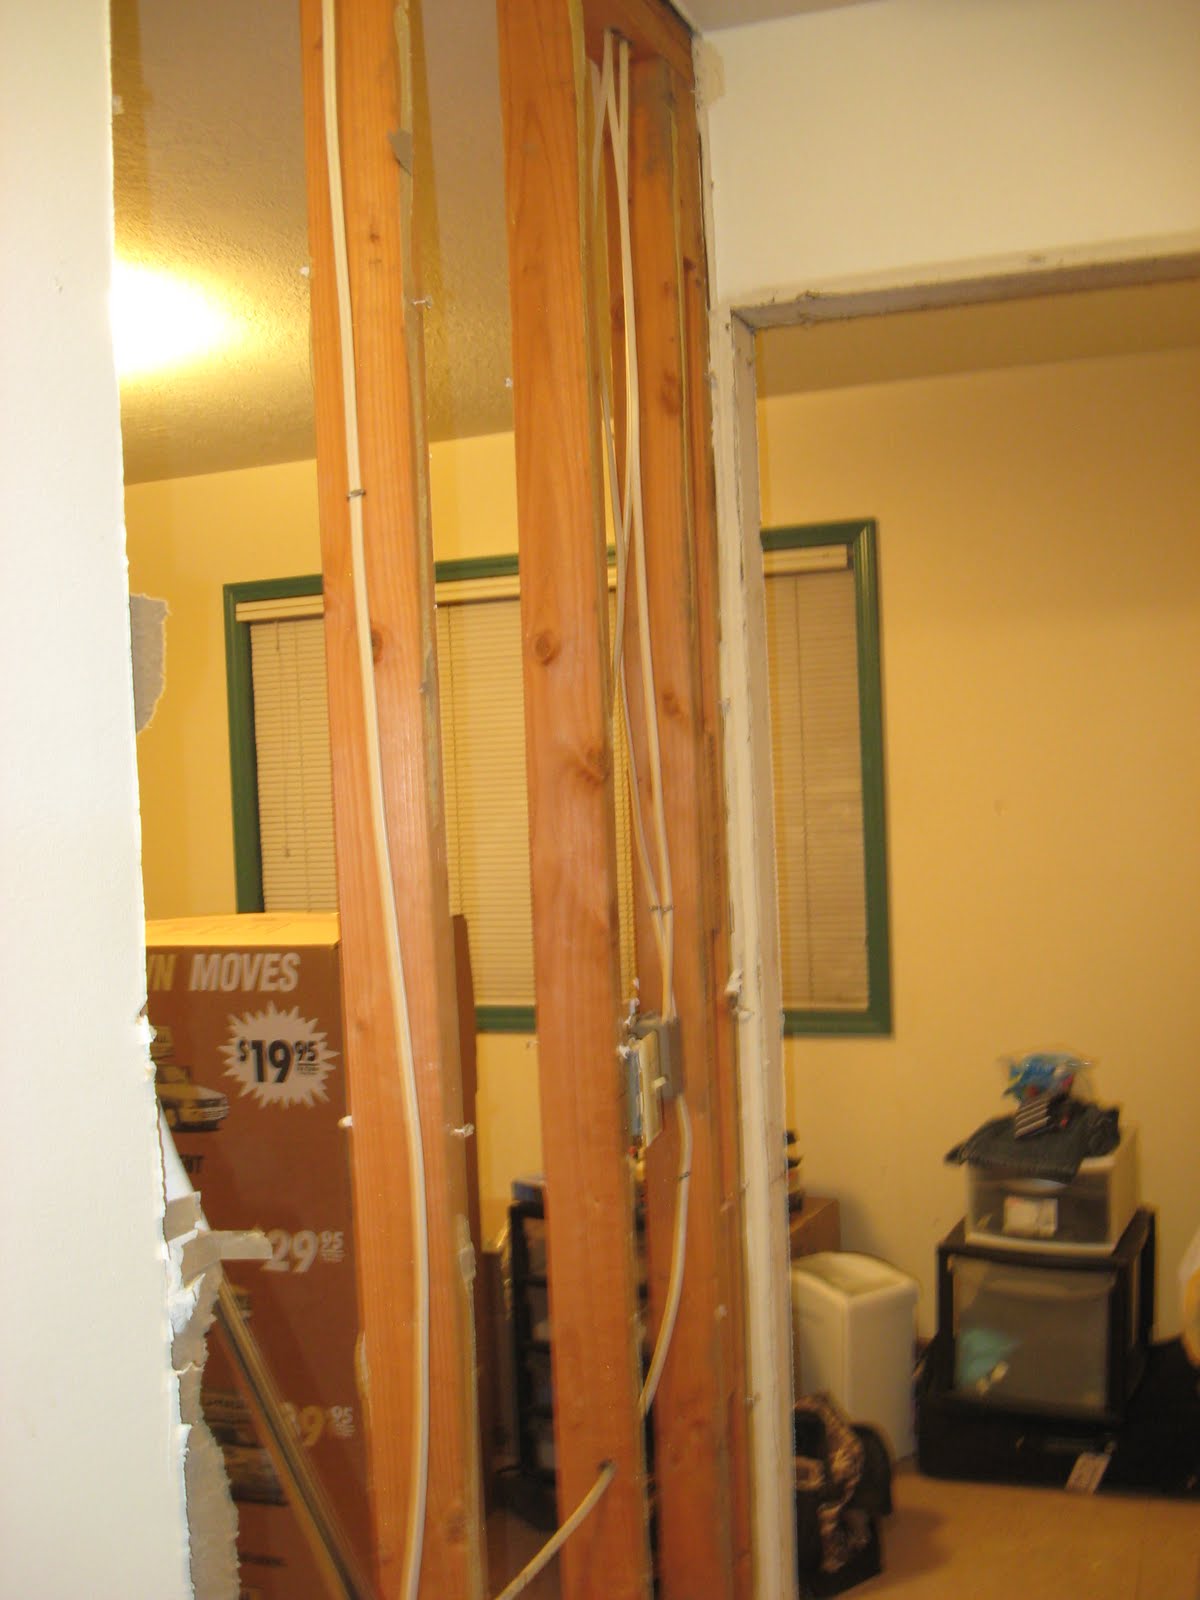
The first step in re-claiming our master was to remove the existing door and tear down the drywall between the bedroom and the hallway. For perspective, the view below is taken from the hallway, looking into the existing doorway and through the wall.
 We also had to (of course) do some electrical work in the room. The bonus was that we could add boxes and outlets in the exact positions to meet our needs. The new alcove created by moving the door will become a vanity area, so we added boxes for wall sconces there as well as new outlets. Because we were moving the door, we also had to move the location of the wall switch. We took the opportunity to add fan switches and switches for some wall sconces we brought with us from Phoenix.

Once we finished updating the electrical, we were able to put up the drywall. We also used the drywall mud to re-texture the existing walls as we had previously done in the hall bathroom.
 Then, a very exciting step- PAINT!!! We also painted the ceiling and window trim.
 In this photo, you can also see the odd little side window- it is filled with some sort of patterned cut glass. A '70's detail that we're definitely keeping. You can also see how excited Vaughan was to get into his new bedroom. (He's even standing in his spot in this one.) You can also catch a (night time) glimpse of the HUGE rhododendron outside the window.
 Finally, we took a trip to our local Lumber Liquidators. We decided to go with the same brand of laminate flooring that we had installed in our condo in Phoenix- Dream Home Nirvana brand. This time we went for Buchanan Oak. It stood up well before, so we expect the same result here. It could even handle our drooling dog (and that's saying a lot!). Another bonus of using a product we were familiar with is that we had previously mastered the installation process- while the boxes note "Easy and Quick Assembly"- it's not quite that simple. But, once you get the feel for it, you can build a rhythm. The cuts slow you down more than the installation. We finished the master in about 4 hours. Unfortunately, they did not have all of the square footage in stock that we needed, but we were able to bring home about 670 sq. ft.- enough to get the back of the house bare-foot ready. Also- in this photo, you can see the soon-to-be vanity alcove area.
Please excuse the unmade bed in this shot- Vaughan was so excited he couldn't even wait for blankets before getting cozy in the new room.


More pictures will come of the master once we finish the vanity area- the tile has arrived and we have picked out the cabinets- more on that later too.
No comments:
Post a Comment