Sunday, September 4, 2011

It's been a while... Let's talk about cabinets!


It's been over a month since we have had a chance to update the blog- and we apologize for getting behind! Just because we haven't been posting doesn't mean we haven't been working on the house, though... so I will do my best to catch up.

One of the big things that happened in August was that we bought our cabinets!!! We decided to go with Ikea cabinets. Because the cabinets are actually made from metal and composite material, and only the faces are actually nice wood, these cabinets are SIGNIFICANTLY cheaper than, oh let's say all cherry cabinets that we had in the condo in Phoenix. We had originally budgeted about $7,000 for all of the cabinets, looking at warehouse and discount stores. The issue with these stores is that you essentially only have the options in front of you. They may not be the exact shapes/sizes you need, or not the right color. When we went to Ikea to browse, we found a style that was exactly what I had pictured in my mind- and had all of the features we wanted, such as soft close doors and drawers, glass front-paned doors for the dining room buffet area, etc.

After deciding what face type we liked, we headed home to design our cabinet layout. Ikea has a program on their website that allows you to design your rooms and print out an item list as well as a 3D rendering. The program itself is a HUGE headache, but completing all of this at home was incredibly beneficial. That way, I could be on the computer looking at options, while Tim could run over to the room and double/triple check measurements. Once we were finally happy with the design, we headed in to the store to purchase the cabinets. This proved to be a headache in and of itself, but, in the end, we completed the purchase and got cabinets for the kitchen, a dining room area buffet and the vanity area in the master bedroom for under $5000. Oh- and that also includes the hardware, a new (farmhouse!) kitchen sink and faucet.

Thankfully, we had Ikea deliver the cabinets- it would have been multiple trips even with Tim's truck. We managed to clear out about 1/2 of the garage and anxiously awaited the delivery. When it finally came, we went through each item, cross referencing with our list, 3 times in order to be sure we had everything and the order was correct. This was quite a process, especially when you consider the crazy names that Ikea gives everything. Luckily, the order was fine. As part of this process, we also divided everything by room- giving an area to the dining room cabinets, kitchen and master.

The first set of cabinets to be installed were in the master bedroom. It was only 2 sets of drawers, so by far the easiest to install. For the vanity, we had previously purchased a tiger's eye glass tile for the counter top. Once the cabinets were built and installed, Tim added a counter in particle board, and a strip of fascia above the seating area. We were also able to install the vanity sconces!

The next step was to tile! This was my first experience laying tile, and I have to say it was not that difficult. I'm sure it also helps that we were tiling a flat surface rather than a wall- good practice for the backsplash and master bathroom! Basically, you spread out a layer of thin-set mortar, using a 1/4" notched trowel to get a consistent thickness. Then, you lay the tile down. The glass tile came in 13" X 13" sheets, so it was as simple as putting the large squares down evenly. We did have a few cuts to make, and rather than using a tile saw, we managed to find my stained glass equipment and used the "chompers" to break the glass. Once the tile is placed, we pressed it down into the mortar and allowed it to dry. Finally, we used a sponge to remove any residue from the glass.


The next step was to grout. For this portion of the project, we had a guest star! My parents actually came in to visit, and of course, were put to work! My mom did a fantastic job of grouting the counter. We decided to go with a dark chocolate grout so that the small tiles would look more cohesive and you would not notice each tile as much as the overall effect.

We also were able to hang the mirror- another Ross find- and add the drawer hardware. The hardware for the vanity was actually purchased at the Home Depot. We found a design that mimicked the design of the mirror and antique chair (which is not pictured).
Overall, I am very happy with how the vanity has turned out. Because we have such small bathrooms in this house, it is really nice to have a separate area to get ready in the morning. Additionally, because we installed outlets on either side of the vanity, it also functions as a desk if I need to set up my laptop.

Sunday, July 24, 2011

The Hardest Part

Isn't the waiting....and it actually isn't living in a remodel- although that is tough. But, while we're on the subject, a few thoughts.

If you are considering living through a remodel, you should really take the time to mentally prepare yourself. You need to be ready to accept that, not only will you not have all your stuff, but even the stuff you do have around will never be readily accessible. You need to accept that NOTHING will EVER be clean. Not until it's totally finished. You will be tripping over wires and climbing over piles of (fill in the blank..drywall, tile, supplies, etc...). You will most assuredly get dirty...and you will be tired. Another bonus- if you are re-doing your kitchen, you may even go through some time where cooking can only be done outside- via the grill, a camp stove, or a firepit. And the only place to sit and eat your food will either be outside or on your bed. Since we all know that food isn't allowed in bed- guess what? It's campfire meals! Every day!! Trust me on this, if you are a person who has never enjoyed camping or "roughing it", go ahead and book an extended stay right now, because living through a remodel is NOT for you.

Even though a part of me is embarrassed to show you these pictures- I think you need to understand what this is really like... so, take, for instance, the view from the front door to the kitchen/dining room/living room. Don't you just LOVE our garbage bag wall? It was actually incredible at keeping some of the dust/dirt off of our living room furniture.

It gets better... Welcome to the Dining Room!

It's not pretty, but that's reality, people.

While all of this has absolutely been exhausting, it has also been an amazing experience. Tim has taught me about plumbing and electrical and drywall and construction- to the point that I KNOW I know more about some of this stuff than some of the employees at the Depot. And, without stepping foot in a gym for ...ahem..a long time, I am stronger than I have ever been. I can accomplish things now that I would have never thought possible 6 months ago. Not to mention that many people think of living through a remodel as one of those things that can "break" a marriage. I know it's only been a little over 2 months, but Tim and I haven't fought once. If anything, I think that this is making us a stronger, better team. I think that maybe, being thankful for these things has helped us to get through all of the not-so-great parts I noted above. Laughter and silliness helps too.

So, with all of that being said, I would like to tell you about the HARDEST thing we have done so far. Framing.

Since we took out the walls surrounding the old kitchen, we had to replace some beams so that the ceiling wouldn't collapse (pretty important). The solution was to install two large header beams- both beams are 10.5" X 3.5" and one was almost 10 feet, the other almost 14. I came home from work on Wednesday of this week to see that Tim had managed, through what I can only assume was black magic, to get the smaller beam in place on his own.

The big one was there waiting for me. Tim says that the beam weighed about 200-250 lbs- but I am pretty sure it was closer to at least 400lbs. Getting the beam in place involved us both holding this beam above our heads and, finally, balancing it on the top of the 6ft. ladder. When we got one side of the beam maneuvered into place, we found that we could simply not get the other side up. The reason being, due to a poorly done remodel in the past, the ceiling had not been properly supported and was drooping. Every time we moved the beam, you could see the ceiling moving up and down with it. At one point, Tim was holding up one end while I frantically ran around him emergency-framing up a "wall" to rest the beam on while we formulated a plan. This was with the big nail gun, which I only used for the first time a few weeks ago, and was now running up and down step ladders with while holding up framing beams. Like I said- stronger. Eventually, Tim had a brilliant idea and grabbed a bottle jack out of the garage. We ended up putting a stud on top of the jack and using it to lift the middle of the beam up. It got the beam to the point that it close, but still not totally into place. Then, I got to beat the beam repeatedly with the BMFH (all over my head), while Tim used the Trojan to try and coax it into place. FYI, the Trojan is a wall pulling lever thingy. (Technical terms). There were many other approaches that didn't work so well.

Once the beam was up, we were finally able to remove all the old kitchen framing that used to be the walls, refrigerator cubby and pantry. You can also see that we have since pulled down the ceiling in the kitchen, since we realized it would be easier to start from scratch than to re-texture what was there.


This was, hands down, the most exhausing, difficult thing we have done so far- but the sense of achievement when that beam finally lined up correctly was amazing. Another way to put it- I am not much of a drinker, but when we finished this, the almost involuntary words out of my mouth were " I need a beer."

Garden Update- Mystery Solved!

For those of you that were wondering about our Mystery Tree, the mystery has been solved!!!


It is a Purple Robe Locust Tree!

http://www.tytyga.com/product/purple+robe+locust+tree (if the link works) has more information about the species. Apparently, it will grow in Montana, Arizona and New Mexico...so if our little seedlings stay alive, I know some people who may be getting new trees :) The article also mentions that bees that feed on these trees can create a very rare and tasty honey- maybe we will try and open negotiations with the giant bumblebees in our backyard.

Also, a rose update- When we moved in, we had three rose bushes- one pink and one red that needed some serious taming (they were approaching 10 ft. tall). We also had one little bush that appeared to be dead. It was nothing but stumps and had been choked out by the Virginia Creeper. Well, we pulled out the creeper and did what we could to give the little rose room to grow. Much to our pleasure, the rose started to send out new shoots- and this week, started blooming!!! Coming from a person who has never been good at Not-Killing plants, this feels like a real achievement. The color is really beautiful on these new roses- when they are opening they are orange, yellow and coral,

but after they open they fade to a really pretty apricot color. They also have an amazing scent.

Sunday, July 17, 2011

Finally adding some Curb Appeal


As you can see, one thing this house was lacking was some.. or any.. curb appeal. After getting the grass down to a manageable level, our next step was pulling the weeds out of the flower bed surrounding the pine tree in front. (We didn't even realize that the bed was there until we mowed the lawn!). We also managed to trim the bushes in front of the house so we could actually find things like the doorbell. Then, as we continued to work around the yard, we found that we had a stock of garden border blocks. So, we decided to tear up some of the grass from the front of the yard and install a bordered flower bed. We suspect there was a time when this area was a flower bed in the past.
Finally, yesterday, we took a trip and bought some plants!

Thankfully, we got them all planted yesterday- because today we would look like drowned muddy rats out there (it's been pouring all morning).

The existing bush behind the mailbox is a combination of a rhododendron and some sort of yet-to-be-determined berry. We planted a holly bush next to it, and in front of the electrical box we planted a peony (hoping it will eventually grow to block the view of the big grey box.) In the rest of the bed, we planted a variety of annuals- a purple heliotrope, a rainbow lantana that goes from pink to orange to yellow, some snapdragons, and petunias in our wedding colors (awwwww).
And yes, the mailbox is ugly... it's on the "Eventually" list.

Around the pine tree, the only things growing were some unknown purple ball flowers, so we added some lady ferns, some oriental lillies (which you can smell all the way in the backyard), purple penstamon and a blue delphinium.

Another bonus of working in the yard on a Saturday is that we were able to meet some more of our neighbors, which is always nice. We got more offers to work on their houses when we finish ours. They don't seem to understand how long it will be before we are done! :) Now, because I am so excited about having color in front of the house, some more pictures of the flowers...

It's definitely not the most amazing landscaping ever to be seen, but it is an absolute improvement.

My Precioussss!

We bought lights.

We bought really really pretty lights.

Really pretty super exiting totally beautiful sparkly shiny awesome lights.

I really love these lights.

Since lighting is really like the jewelry of a house- it's also, much like jewelry, the last thing to put on. However, since we finished the painting and the flooring in the hallway, I convinced Tim that we should absolutely, positively, put in the hallway light. If nothing else, just to have a taste of what the house will feel like when totally completed. I like to stare at it.

The hallway fixture is a glass bowl filled with crystal drops that look like rain. It makes rainbows on the walls. I am in love. It will also match the two pendants to *someday* be installed over the peninsula in the kitchen..which will *someday* exist. I wish that the photo did it justice!

We also installed a can light at the end of the hallway which will *someday* light some artwork. I should note that we got all of the main lighting fixtures at Lamps Plus (hall light, two pendants, two sconces for the master vanity, dining room fabulousness, and entry light that is so awesome it makes me giggle when I think of how cool it is). I found the lighting store totally overwhelming - there were some seriously fabulous fixtures in there. Also seriously expensive. This place honestly had a crystal ball fixture priced at $53,000.00. And no, that is the correct number of zeros. But, I managed to keep myself on a leash and we got everything for only about $1100. Not too bad for seven fixtures- it didn't hurt that they were having a summer sale.

I should also mention that Tim thankfully convinced me to spend a little extra on the light switches. They are his fancies. He loves them. He is very excited to turn the lights on and off in the hallway. And, I admit, they are SUPER COOL. We got Lutron Maestro switches- they are a digital push button dimmer and do all sorts of tricks- such as remembering what level of light you want, fading on and off, and even delay in turning off (giving you just enough time to walk from the hall to the bedroom without having the toe stubbing- shin hitting issue of walking in the dark). They are very fancy.

I can't wait to see the other fixtures installed!! And I can't wait to share pictures of them!!

Our first step toward being guest friendly


After we finished the master, we moved on to the Office/Guest Room. Luckily, there was very little electrical work to do here (other than replacing the outlets & switches), and only a few drywall patches. So, with very little mud, we were able to move straight to paint and flooring! After Tim convincing me on some pretty neutral colors in most of the house, I was able to talk him into a beautiful dark charcoal grey for this room. Also, because there were not as many cuts, we were able to finish the flooring in this room in about 2 hours.
We also concocted our own lighting solution for this room. We had a lamp that did not make it through the move, so we decided to use the lampshade and a $5 lighting disc from Home Depot to create a fixture. It was pretty easy, and obviously very economical. Of course, it's pretty hard to see in photos. So, just trust us.. it looks pretty good. :)
Of course, we still have to decorate and someday decide on a solution for the computer desk that does not involve using our camping tables- but for now, we're calling it good and moving on.

We finally have a real bedroom!

It's been some time since we've added any updates to the blog- mainly because we started out thinking we would post as each individual project was completed. We are now coming to a point where there are some rooms and areas that are partially completed- but it may be a while before we are comfortable calling them "done". So, with that being said, we wanted to give an update on some of the things we have been working on over the last few weeks.

We'll start with the master bedroom. When we moved in, the door to the master was located at the end of the hallway. The awkward footprint this created gave the room little usable space, and had we left it alone, we would have had the bed pushed into a corner. We quickly realized that by moving the door to the room, we would be able to gain some square footage. Knowing we would be creating a mess in that room, we initially set up our temporary bedroom in the small back bedroom of the house.

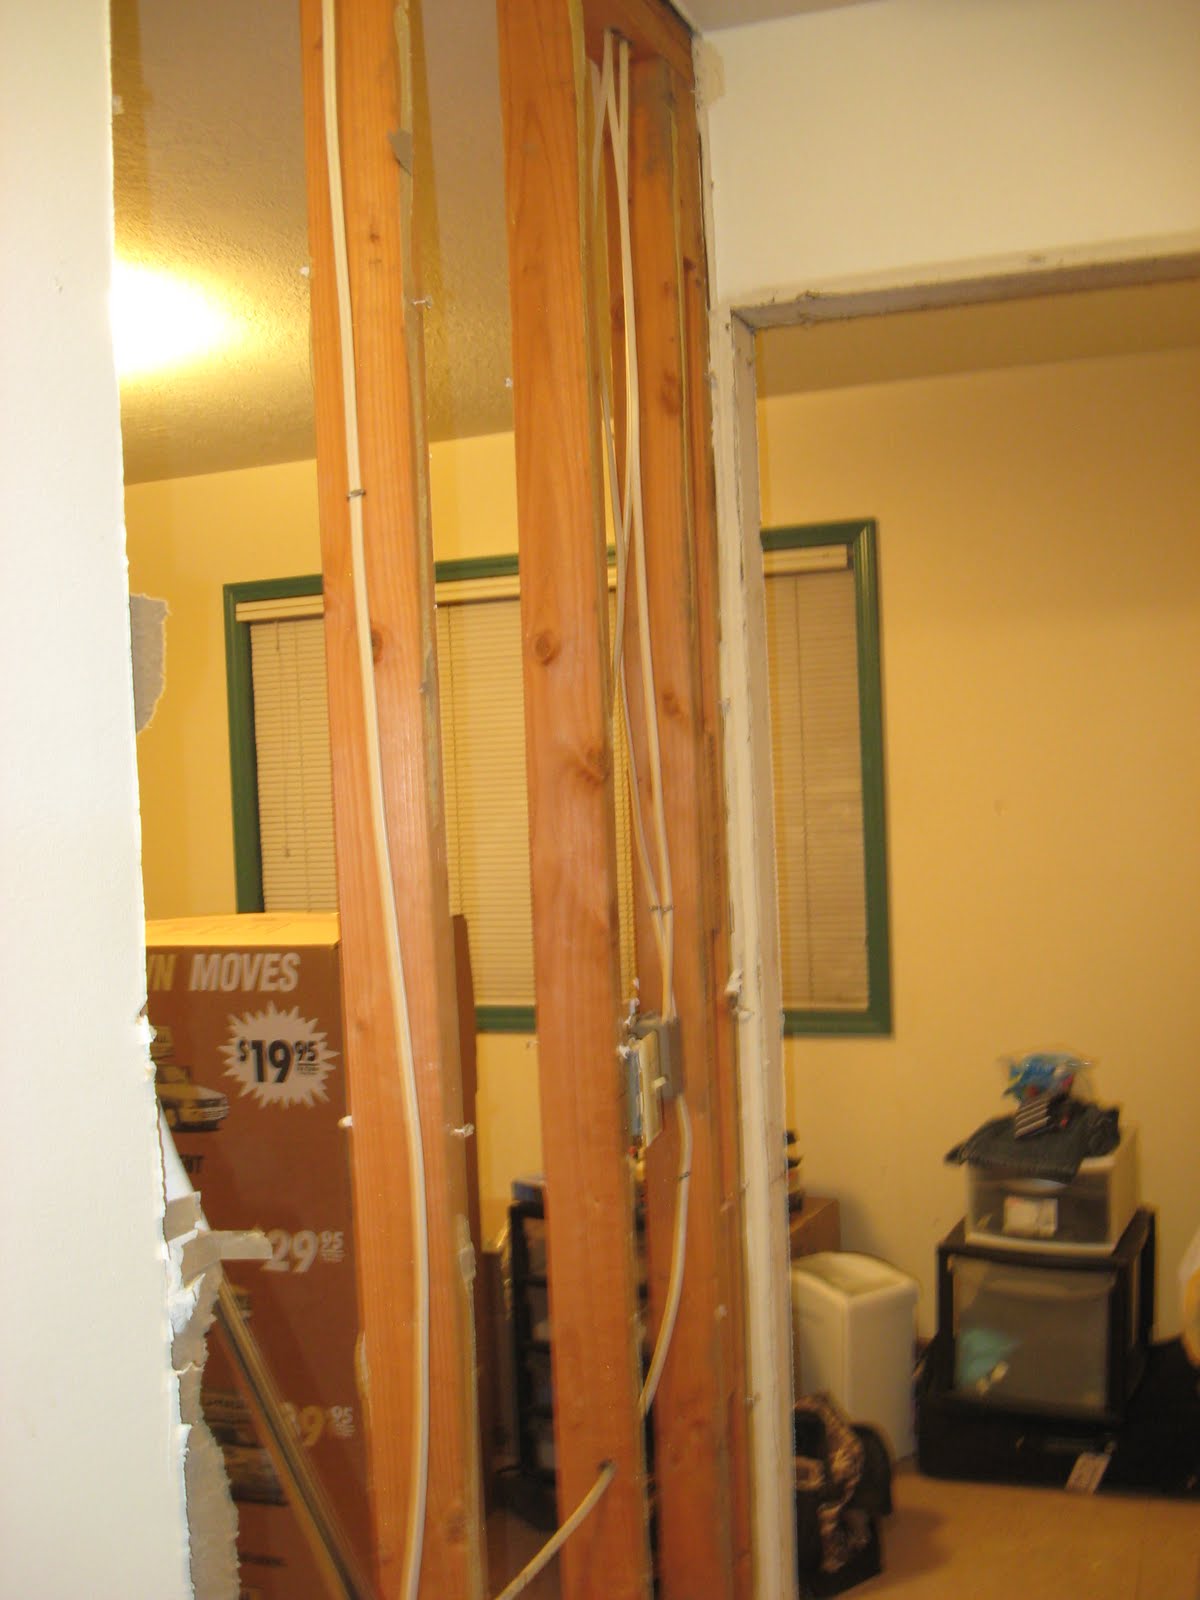
The first step in re-claiming our master was to remove the existing door and tear down the drywall between the bedroom and the hallway. For perspective, the view below is taken from the hallway, looking into the existing doorway and through the wall.
We also had to (of course) do some electrical work in the room. The bonus was that we could add boxes and outlets in the exact positions to meet our needs. The new alcove created by moving the door will become a vanity area, so we added boxes for wall sconces there as well as new outlets. Because we were moving the door, we also had to move the location of the wall switch. We took the opportunity to add fan switches and switches for some wall sconces we brought with us from Phoenix.

Once we finished updating the electrical, we were able to put up the drywall. We also used the drywall mud to re-texture the existing walls as we had previously done in the hall bathroom.
Then, a very exciting step- PAINT!!! We also painted the ceiling and window trim. In this photo, you can also see the odd little side window- it is filled with some sort of patterned cut glass. A '70's detail that we're definitely keeping. You can also see how excited Vaughan was to get into his new bedroom. (He's even standing in his spot in this one.) You can also catch a (night time) glimpse of the HUGE rhododendron outside the window.
Finally, we took a trip to our local Lumber Liquidators. We decided to go with the same brand of laminate flooring that we had installed in our condo in Phoenix- Dream Home Nirvana brand. This time we went for Buchanan Oak. It stood up well before, so we expect the same result here. It could even handle our drooling dog (and that's saying a lot!). Another bonus of using a product we were familiar with is that we had previously mastered the installation process- while the boxes note "Easy and Quick Assembly"- it's not quite that simple. But, once you get the feel for it, you can build a rhythm. The cuts slow you down more than the installation. We finished the master in about 4 hours. Unfortunately, they did not have all of the square footage in stock that we needed, but we were able to bring home about 670 sq. ft.- enough to get the back of the house bare-foot ready. Also- in this photo, you can see the soon-to-be vanity alcove area.

Please excuse the unmade bed in this shot- Vaughan was so excited he couldn't even wait for blankets before getting cozy in the new room.

More pictures will come of the master once we finish the vanity area- the tile has arrived and we have picked out the cabinets- more on that later too.